Dear friends, readers, and subscribers:
Please note that there will be no new content for a little while, as my kitchen is in the process of being shipped to Germany. For now, I am always in other people's kitchens.
Once I am up and running again, I expect to resume posting, but there may be a little bit bigger of a gap than usual.
Please do check back for updates - I'm looking forward to getting back into the kitchen, and cooking up great food in a completely different environment!
Until then...
Guten Appetit!
September 08, 2013
August 19, 2013
Breakfast at Home: Orange Breakfast Polenta

This is something a little different, for those looking for a hot breakfast cereal that isn't oatmeal-based. The polenta is soft and creamy (vegans could use almond yoghurt or coconut cream instead of yoghurt), but if you make extra, it sets up quite firmly and can be sliced and fried, for a different effect, the next day. It is a little bit sweet, but not very. If you want it sweeter, you may wish to increase the honey a bit.
We served ours with bacon, because we like bacon, but broiled grapefruit halves would also make a great side. Next time I make this I might use half water and half orange juice, just to bump up the orange flavour without using the extract.
Orange Breakfast Polenta
Serves 2
1/2 cup peeled mandarin orange segments, in juice
2 cups water
1/2 cup cornmeal
1/4 cup plain Greek (or Mediterranee) Yoghurt
1/4 teaspoon Kosher Salt
1 teaspoon real orange extract (or orange zest)
1 tablespoon honey or sweetener of your choice
Bring the water and the juice from the mandarins to a gentle boil. Add cornmeal in a steady stream, stirring constantly with a whisk, and then lower the heat to medium; continue to stir and cook for ten to twelve minutes. (Start with a whisk, then switch to a silicone spatula or wooden spoon as it thickens). When you set your whisk aside, it helps to be able to soak it in water right away, for easy clean up later.
While the polenta cooks, somewhere around the half-way point, add the orange extract or zest, the salt, and the honey. Stir as continuously as possible, being careful that it doesn't bubble up and splash you - hot polenta clings and burns!
After 10 minutes, remove from the heat. Add yoghurt and stir until smooth. Pour into 2 bowls and arrange orange segments on top. Dust with cinnamon or clove if you like.
Pretty, easy, and delicious!
August 11, 2013
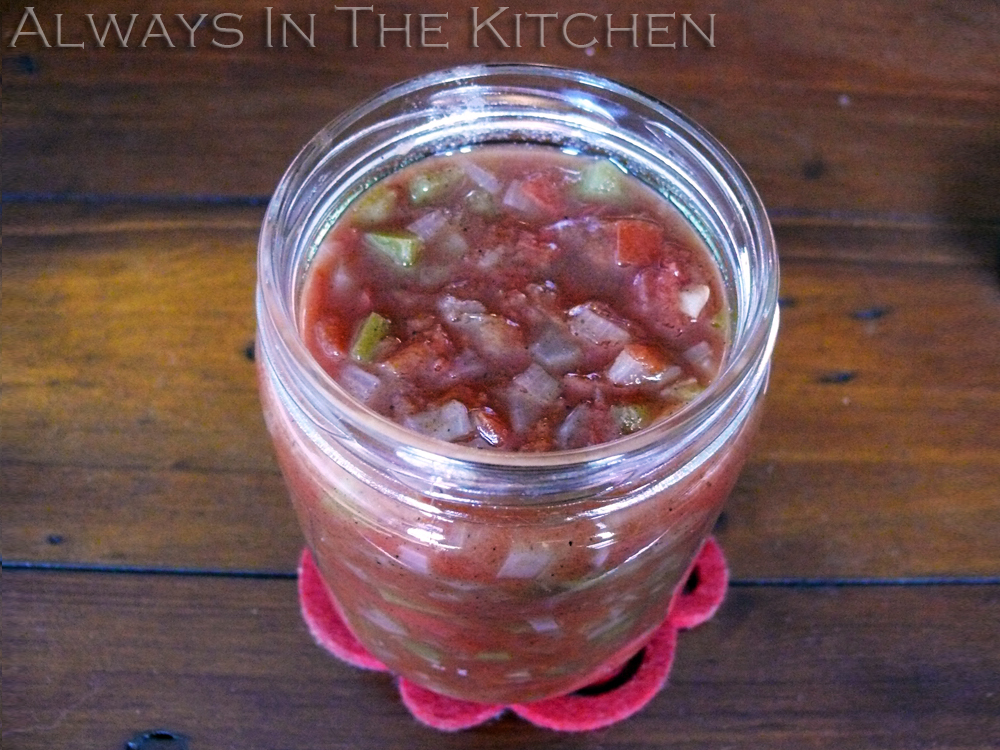
Jamaican Tomato Relish (Small Batch)

Unlike most of the recipes in my Jamaican repertoire, this is not spicy. Of course, you could change all that by adding a seeded, minced habanero along with the green bell pepper, but that's entirely up to you. It's a snap to make, requiring only a little chopping, a little simmering, and a non-reactive container to store it in.
This relish is great on burgers, hot dogs, cheese sandwiches, savoury pies, as a dip for tortilla chips (or crackers!), and as a bruschetta topping - pretty much anywhere you might otherwise use a salsa. It also keeps for a few weeks in the fridge without loss of quality. It's sweet and tangy and wonderfully summery.
I note that you can use a food processor to dice your vegetables, but the finished effect is much nicer if you chop them by hand.
Jamaican Sweet Tomato Relish
Small Batch
Makes 2 cups
1 medium yellow or red onion
1/2 large green bell pepper
5 medium Roma tomatoes, seeds removed
1/4 cup sugar
1/2 cup vinegar
1/2 tablespoon Kosher salt
1/8 teaspoon ground cloves
1/2 teaspoon ground Cinnamon
1/2 teaspoon ground Allspice
Finely dice the vegetables, and place them in a medium sauce pan with the sugar. Bring up to a simmer (don't add water - the sugar and the juices from the vegetables will provide ample cooking liquid), and let simmer, covered, over a low temperature for 20 minutes. Add the vinegar, salt and spices, and simmer another 20 minutes (uncovered) over medium heat, to thicken. Allow to cool slightly, and store in a glass jar. Store in fridge and use within 6 weeks.
Note: The first cooking stage smells kind of off-putting, because green peppers cooking in sugar is not the nicest smell in the world. Wait it out, it gets better. Also, try not to breathe in the vinegar when you pour it into the dish - the fumes are choke-inducing. Use your kitchen fan, if you have one.
⚠ SAFETY NOTE: This recipe is NOT intended for canning, but rather for immediate consumption. The proportions of ingredients have not been calculated for preserving purposes, and it may not be safe to do so. Please do not attempt to use this recipe for canning.
This has become my favourite sweet relish. I often scoop some up with crackers as a snack.
August 01, 2013
Breakfast at Home: Huevos en Cenotes

This is too good an idea not to try, especially if you find you need to use up a bunch of corn tortillas. For smaller families, those packages of 50 small corn tortillas can take a while to go through. Sure, there's the tacos, and enchilada casseroles, and other classics like migas, or chilaquiles. But this...this is a keeper. It's easy enough to do on a weekday, if you're just doing up one quickly for yourself, and it's a hearty, filling breakfast that will carry you through your morning.
I made a couple of minor tweaks to the Pioneer Woman original recipe that in spired this, the most significant being a tiny pinch of cheese between the layers of tortillas, which acts as an anchor to keep the bits from sliding around as you flip them. If you're feeling really feisty, tuck a little minced chile into the cheese mixture between the layers of tortillas. Another minor difference is that I use four tortillas per stack, because I generally stock large eggs in my kitchen. Of course, multiply these instructions by however many people are at your table.
Huevo En Cenote
adapted from Pioneer Woman's "Huevo In The Hole" recipe
Serves 1
4 corn tortillas (4" size)
1 egg
1/4 cup grated cheese, such as Edam (or Cheddar, or Jack, or Mozzarella)
1/2 tablespoon butter or corn oil (or similar, for frying)
freshly chopped cilantro and green onion (optional garnish)
Fresh Salsa (or hot sauce) to serve
Cut out the centre of the tortillas (I used a biscuit cutter, so I had to do them one at a time). Put the middles aside for another use - mini tortilla chips perhaps? Layer the tortilla rings with tiny pinches of cheese (too much, and it will run out the sides and be a bit messy). Preheat a smallish skillet over medium-high heat. Melt a bit of butter right in the area that you're going to place the stack, let it melt and foam out, and then add the tortilla stack. Swirl the stack around a bit (while holding it down firmly) to make sure that the bottom layer of tortilla all gets a little bit of butter on it. Crack an egg into the hole in the stack, and let cook until it is set on the bottom, and starting to turn opaque in the middle. Adjust the heat down to medium, so the tortillas get crisp rather than burned.

When you judge that the egg is about half way cooked through, slide a spatula underneath the stack and flip it over. As with pancakes, a quick, confident, controlled motion is best, but the cheese melted between the tortilla layers does help hold things together.
Once the egg is cooked to your satisfaction, plate and serve. I recommend using a sharp knife to slice through the firm layers of crispy and soft tortillas.

Garnish however you like. Hot sauce, avocado, fresh salsa, cilantro, pickled red onion, bacon, more cheese...really, it's customizable to the nth degree.
This is every good as bit as you suspect it might be.
July 25, 2013
Refrigerator Triage: Salsa Pie

You know when you have that bit of salsa left over, but no tortilla chips or even tortillas? Sure, you might just throw it on a cheese sandwich, make an omelette, or even just pop it into the freezer, but you should also know this: it makes a wonderful ingredient for savory pie.
So, this is one of those lazy posts where I'm really giving you more of a serving suggestion than a recipe.
You will need pastry for a double crust pie - such as this tried and true pie crust recipe:
Double Pastry Crust
for a 8 or 9" pan
1 1/2 cups all purpose (unbleached) flour
1/2 cup butter
pinch of salt
1 tablespoon vodka
4 tablespoons cold water
Place the flour in the bowl of a small food processor fitted with a metal cutting blade. Add the pinch of salt and the butter (cold is best) in chunks, and pulse until well mixed, and the butter is in pieces no larger than a piece of confetti. Add the vodka and the water, all at once, and pulse again, continuing to pulse until the dough comes together and pulls away from the edge of the bowl. If the dough won't come together, try adding a tiny extra spritz of water. Dump the dough onto your lightly floured work surface, and, as quickly as possible, shape it into a couple of flat discs. Chill the dough for 10 minutes, then roll out as needed.
For the pie filling, this is my usual method:
Fry up some finely diced onion and protein of your choice - here I've used lean ground beef, but you could use any ground meat or analogue you want. Add a little stock to enrich the taste if you like, otherwise just use a bit of water (about a quarter cup). Season the meat to taste with cumin, garlic, oregano, and ground chiles. If your salsa is not very salty, and if your beans are unsalted, you might want to add a little bit of salt now, too.
Add about 400 mL cooked beans - here I've used black beans, but you could use kidney, canellini, pinto, even re-fried beans, if that's what you have. If you mash about a third of the (whole) beans, that helps hold the filling together at the end, when you're slicing the pie. You could also sprinkle a little flour over the meat mixture as it fries, to thicken it (or use a slurry - I won't judge). In goes anything else you think would be good. We always have chiles, so in go a few chopped chiles, we usually have frozen corn, so in goes some of that, and at last, the salsa goes in to tie everything together. A cup of salsa is a good amount, but if you don't have that much, don't worry.
Once everything is well combined, and you've tasted it and adjusted the seasonings to your preference, set it aside and roll out your pie crust. Put the filling in (it doesn't need to cool down) and make sure it's evenly distributed (a low dome in the centre is nice), cover and seal the edges in the manner you like best, slit the top in a few places, and then bake at 450 F for 25 minutes, turning it down to 350 F for another 10 minutes or so, until the crust is completely golden top (and bottom, if you're using a glass pie plate, it's easy to check).
Let the pie stand for about 10 to 15 minutes before slicing. While the pie rests, you can make a nice salad to go with, like the purple cabbage buttermilk slaw in the picture.
Still got extra salsa left? Serve it on the side!
PS: Want a vegetarian version? Use your favourite vegetarian pie crust, and use brown lentils in place of the ground beef (the same method as you would use for lentil tacos, for example), or a combination of brown lentils and barley or bulgar wheat. You may want to mash a few more of the beans, to ensure the filling holds together in the end (rather than spilling all over the plate, leaving a sad, deflated crust).
July 11, 2013
Shrimp & Grits

Grits take a while to cook, it's true (even "quick" grits...and let's not even consider instant grits, which are par-cooked and more finely ground to speed along the cooking, but which suffer texturally), but shrimp take almost no time at all, so it balances out, more or less. Can't get grits? Make your favourite cheesy polenta recipe instead (like the one previously showcased for making polenta fries and Meatballs & Polenta). It won't have the same texture, but it will be a lovely bed for the shrimp to sprawl upon.
The shrimp portion of this dish comes together pretty darn quick, so make sure that your grits (or polenta, if you're going that route) is pretty much ready to serve before you fire up the frying pan.
For two servings:
250 grams peeled shrimp (31-40 count, or 20 shrimp)
2 slices thick cut bacon, cut into matchsticks (or thin lardons)
2 green onions, finely sliced
1/2 red bell pepper, finely diced
1-2 jalapenos or serranos, or green chiles, finely diced
Fry up the bits of bacon over medium-high heat until they start to crisp. Spoon off some of the fat, if necessary, so you just have a thin layer in the bottom of the pan. Add the shrimp, and give them 30 seconds without disturbing. Flip each shrimp over, and add the peppers and onions. Let them cook for 15-20 seconds undisturbed, then stir and sauté until the shrimp are pinkly opaque instead of grey and translucent, and the vegetables are softened and crisp around the edges. If you like, you can add a good pinch of your favourite cajun-style spice mixture, or just a quick hit of cayenne (or Tabasco sauce). You shouldn't need additional salt, because the bacon is salty enough to season the whole dish.
Serve up the polenta into shallow bowls, and tumble the shrimp and vegetables over top. Top with freshly ground black pepper, and serve.

July 01, 2013
Turkey Enchilada Casserole
Happy Canada Day, everyone! Now, "enchilada" may not be the most Canadian thing you've ever heard of, but we do seem to enjoy a good casserole, and we love adopting other cuisines into our own. This is a very tasty recipe that takes a bit of time to put together, but is very satisfying.

This is Palle's recipe. It is at its best when eaten fresh, but can be packed for lunch the next day. It can also be frozen, but the texture suffers a bit on re-heating (the tortillas are softer). In that case, add a healthy dose of salsa, or a Mexican-style hot sauce, such as Cholula to pep it back up again.
Turkey Enchilada Casserole
Serves 6 - 8
1 teaspoon or so of lard or oil
1/2 medium onion, finely chopped
675 grams ground turkey meat
2 cloves garlic, crushed
1/2 teaspoon Mexican oregano
1/2 teaspoon ground cumin
5 cups red enchilada sauce (see below)
salt
425 grams corn tortillas (12 to 16, depending on size)
1 cup soft goat cheese (or feta), crumbled
1 cup cheddar, shredded
cilantro
Heat the lard or oil. Add onions and fry over high heat. Add turkey, garlic, oregano, and cumin until turkey is crumbly and no longer pink, about 4 minutes. Stir in one cup of the enchilada sauce. Add salt to taste.
Cut tortillas in half, if they are large (even if they are small, you may wish to cut some of them in half to ensure good coverage of the casserole dish). Spray or brush a shallow 3-quart casserole dish with a little oil. Dip the tortillas into the enchilada sauce just before they are added to the casserole, but don't dip them faster than you are layering them into the dish, or they may get soggy and fragile. Using tongs greatly speeds up the dipping/layering process.
Arrange one fourth of the tortilla halves evenly over the bottom of the casserole, overlapping to ensure coverage. Sprinkle a fourth of the cheese evenly over the tortillas, then top with a third of the turkey mixture and a cup of the enchilada sauce, spreading until level.
Repeat to make two more layers of tortillas, cheese, turkey mixture, and sauce. Top with another layer of tortillas, sauce and cheese.
Bake at 425° until the cheese is melted and the casserole is hot in the center, 18 to 20 minutes (30 minutes if you are starting with a made-ahead, chilled sauce). Serve with a sprinkle of chopped cilantro.
Note: the number of tortillas you need will depend on the size of your casserole, and the size of the tortillas. Likewise, you may need more or less cheese.
Red Enchilada Sauce
Makes 5 cups
4-6 large dried chilies (such as ancho, pasilla, guajillo)
1 small onion chopped into 4 chunks
4 garlic cloves
6 Roma tomatoes
1 teaspoon Mexican oregano
1 teaspoon ground cumin
salt
brown sugar
You can use any dried Mexican chilies, but ancho is my preferred chili for this. As always, a blend of two or three chilies is best. Toast the chilies in a dry pan over medium heat until fragrant and turning colour (most chilies will turn red), but before they smoke too much. Keep turning the chilies so they do not burn. Put the toasted chilies in a bowl of water, and let them soak for about 15 minutes. When soft, tear off the stems and pull out the seeds.
Toast the onion and garlic in a dry pan over medium heat until there is a good amount of black on the outside, turning occasionally. Remove, then toast the tomatoes in the pan over medium heat until they blacken, turning occasionally. Always blacken the tomatoes last as they tend to burst and so add moisten to the pan.
Bring six cups of water to a boil in a saucepan and add all of the chilies, onion, and garlic. Reduce the heat and simmer for fifteen minutes, uncovered. The chilies will float to the top, so push them under from time to time.
Transfer the tomatoes, the oregano, cumin, and the saucepan with all its contents (including the water, but add the water after you've started pureeing) into a food processor. Blend until the mixture is very smooth. Be careful because the mixture is very hot.
Return the contents of the food processor back to the pan by forcing the mixture through a strainer with the back of a spoon to remove the bits of chili and tomato skin that remain. Don’t skip this step as it greatly improves the texture of the finished sauce.
Heat the strained enchilada sauce and simmer for 15 minutes to blend the flavors and reduce it a little. Taste, and add salt and sugar as needed. Sugar will balance out the acridity of the chilies, but add a little at a time, as it shouldn’t take too much.

June 27, 2013
Orange Flower Glazed Beets

Beets have a bit of that love 'em or hate 'em thing going on. Judging by the lingering trend of beet salads in restaurants along the west coast, I'm guessing a lot more people love them than not - although I'm betting certain vegetarians I know are a little tired of beet-salad-as-token-veggie-item on the menu.
Happily, there are other things you can do with beets other than salad-izing them (although this recipe would be awesome as part of a salad. I'm just saying). Borscht is a perennial favourite, of course, and pickled beets are still a very good plate-finisher, for those times when you just want a little extra splash of colour and another vegetable on the plate. While technically still a salad, Ethiopian Beet & Potato Salad is a very different creature from the leaf-based beet salad offerings in these parts, which may or may not sport feta, gorgonzola, walnuts, pumpkin seeds, or all of the above.
Orange flower water gives this a slightly exotic, yet hard to define quality that feels quite elegant. Orange flower water can be found at most Middle Eastern groceries, and some regular supermarkets, too. It is usually stored right next to the more commonly known (around here) rose water, so if you ask for it and get a blank, ask for the rose water, and then look to see what else they have. Come to think of it, these might be pretty good with rose water, too. Hmm.
These are pretty easy to make, and best of all, they are delicious hot or cold, so go ahead and make a full batch.
Orange Flower Glazed Beets
Adapted from Simply Recipes
2 pounds red beets, small or medium in size
Olive oil
Kosher salt
1/2 cup balsamic vinegar
2 teaspoons sugar
1 tablespoon orange flower water
pinch of white pepper
Wash your beets and peel them. I recommend using a good vegetable peeler or small sharp knife, and peel them under running cold water, collecting the peels in a sieve or colander. Then, simply shake the excess water off of the peelings, dump them into your compost bucket (or a bag to go into your garbage, or however you dispose of such things).
Slice your beets into wedges, and lay them out on a big sheet of heavy duty foil that has been lightly oiled with olive oil. Sprinkle sparingly with salt, and fold the foil sheet into a pouch, sealing the edges well. put the pouch on a big baking sheet (if you're clever, you might start with the baking sheet already under the foil), and pop it into the oven for 45 minutes at 400 F, or until the beets are tender. Test them at that point by sliding a knife into one (right through the foil) to see if they're done. If not (unlikely) let them cook another fifteen minutes, and try again.
When the beets are done, take them out of the oven and peel back the foil so that they start to cool down. Be careful about the steam when you open the foil - it can burn you quite badly. I use a long handled fork to tear my foil open.
While the beets are resting, put the vinegar, sugar, orange flower water, a pinch of salt, and white pepper in a skillet, and cook over high until it becomes thick and glaze-like. Turn off the heat, and add the beets to the skillet, stirring them gently around until they are completely coated with the glaze. Taste, carefully, because liquid sugar is really darn hot, and adjust for salt if necessary. Transfer to a serving bowl and serve warm, or allow to cool, and chill until needed.
June 18, 2013
Khoresht e Gharch: Persian Chicken & Mushroom Stew

Khoresht e Gharch
Persian Chicken Stew with Mushrooms
Adapted from My Persian Kitchen
Total Prep & Cooking Time: 65 minutes
Serves 8
8 chicken thighs, bone in, skin on
¼ teaspoon kosher salt
2 medium yellow onions, diced
2 cloves garlic, minced or crushed
½ cup water
600 grams mushrooms, chopped
1 tablespoon unbleached flour
Large pinch of saffron, brewed
¼ cup freshly squeezed lemon juice
1 tablespoon olive oil, divided
2 large egg yolks
Dice the onion fairly finely, and mince or crush the garlic. In a large pot, such as a dutch oven, sauté the onion and garlic in a half-tablespoon of olive oil over medium-high heat, until golden and translucent.
Season the chicken pieces with kosher salt. Scrape onion to the sides of the pot, and add the chicken pieces, skin side down. Cook for about 3 minutes on each side, then add ½ cup of water, stir well, cover, and cook on medium-low heat for 30 minutes.
While the chicken and onions cook, brew the saffron and prepare the mushrooms. To brew saffron, grind it (along with a pinch of salt) with a mortar and pestle until powdered. Put the powder in a small bowl or measuring cup, and add a couple of tablespoons of hot (recently boiled) water. Let it stand until you are ready to use it.
To prepare the mushrooms, clean and coarsely chop the mushrooms of your choice (removing any woody bits). Sauté the mushrooms in a half-tablespoon of oil over high heat, until their juices come out, and continue to cook until the liquid evaporates. Sprinkle the flour over the mushrooms and season with a little salt and pepper. Stir well, continuing to cook, and continue to stir and cook until it is well combined.
Add brewed Saffron and lemon juice to chicken and stir thoroughly. Add the mushrooms, and continue simmering (uncovered, now) for about 10 minutes. Beat the egg yolks in a bowl and carefully temper them with a bit of the hot liquid from the stew. Add the tempered egg yolks to the pot and continue cooking for another 15 minutes, stirring occasionally. Taste, and adjust salt and pepper if necessary.
Serve over rice.
June 13, 2013
Persian Carrot & Apple Salad

Persian Carrot & Apple Salad
adapted from Persian Style Carrot Salad recipe on Food.com
Serves 3
2 carrots, peeled and shredded with a vegetable peeler
1 Granny Smith apple, peeled and shredded
30 grams slivered almonds, toasted
1/2 tablespoon olive oil
2 tablespoons fresh lemon juice
1/2 teaspoon ground cumin
1/4 teaspoon ground cinnamon
1/2 teaspoon sugar
Peel the carrots with a vegetable peeler, then continue to use the peeler to take long thin shavings of carrot until the carrot is completely shredded. Peel the Granny Smith (or other tart, green apple) with a knife or peeler, and shred on the coarse side of a box grater.
Combine the olive oil, lemon juice, cumin, cinnamon and sugar. and pour over the carrot and apple mixture. Toss well with a fork (or two) to ensure that all of the strands are coated with the seasoning mixture.
Toast the almonds in a small skillet over medium heat until golden brown and fragrant. Sprinkle over the salad, and serve.
If you are making the salad a few hours ahead, reserve the almonds until you are ready to serve, so they maintain their crisp texture.
Subscribe to:
Posts (Atom)


